The lesson describes how to install the software to work with the Arduino system under Windows 7, how to connect the board to the computer and download the first program.
Previous lesson List of lessons Next lesson
I do not know how much this lesson will be useful for English-speaking users. The lesson describes the sequence of actions when installing the Arduino software for the Russian-language version of Windows 7. There are a lot of information on installing the Arduino IDE on the Internet. Perhaps you will be more comfortable using other materials.
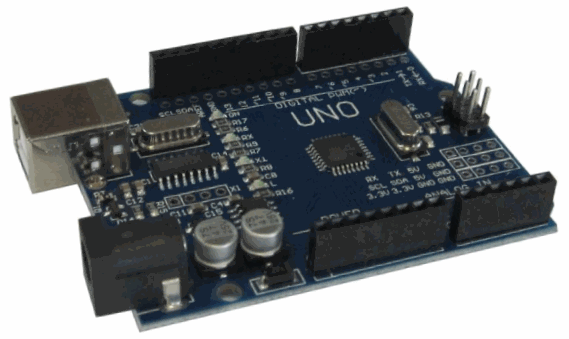
To install the software and connect the Arduino UNO R3 controller to a computer, you need:
- controller board;
- USB cable (usually supplied);
- a personal computer with Windows operating system connected to the Internet.
The board can be powered by the USB port of the computer, so an external power supply is not required.
Installing the Arduino IDE.
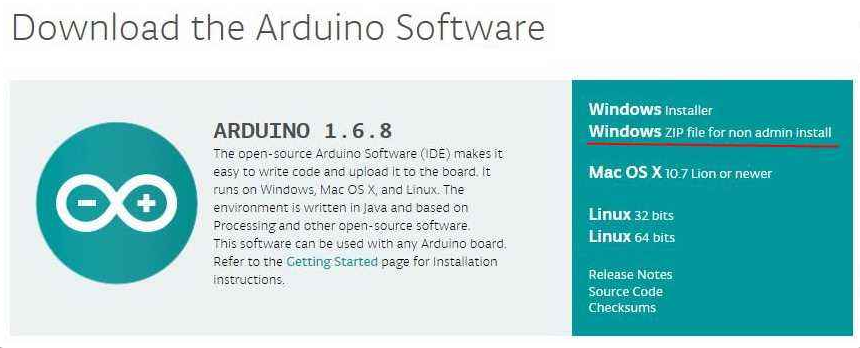
First of all, you need to download the latest version of the program. You can download the ZIP archive from the official website of the Arduino system support at this link. You must select a line with the correct operating system - Windows ZIP file ...
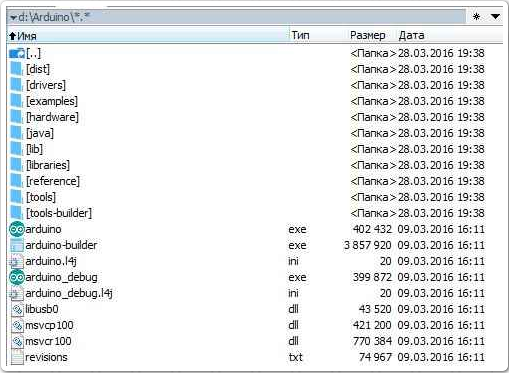
Create a folder, for example Arduino, and unzip the zip file into it.
Connection board Arduino.
Using a USB cable, connect the board to the computer. The LED (marked ON) should light up, indicating that the board is receiving power.
Driver installation.
I know the Arduino UNO R3 boards using a USB-UART bridge:
- ATmega16U2 chip (original version);
- chip CH340G (Chinese clone).
The driver installation processes for these options are different.
Driver installation for ARDUINO UNO with ATmega16U2 interface converter.
After connecting the board to the Windows computer, it starts the process of installing the driver. After a while, a message appears indicating that the attempt failed.
The driver must be installed manually. To do this, go to Start -> Control Panel -> System -> Device Manager.
In the Ports (COM and LPT) section, there should be an Arduino UNO with a warning yellow icon.
Right-click on the icon.
Select Update Driver.
Continue To search for drivers on this computer.
Manually specify the location of the driver. The ArduinoUNO.inf file is located in the Drivers folder of the folder where the archive is unpacked.
In the Ports (COM and LPT) section, a new, virtual COM appears. You have to remember his number.
Driver installation for ARDUINO UNO with interface converter CH340G (Chinese clone).
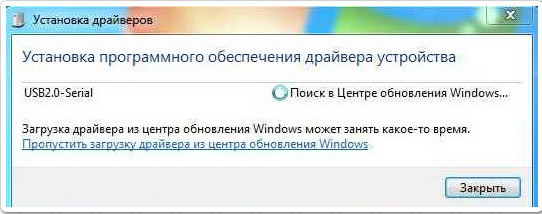
After connecting the board to the computer, Windows itself will begin the process of installing the driver.
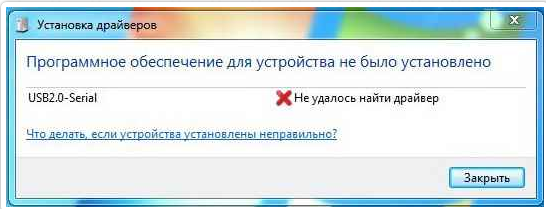
After a while, a message appears indicating that the attempt failed.
The driver must be installed manually. To do this, go to Start -> Control Panel -> System -> Device Manager.
There was a new USB2.0-Serial device with a yellow warning icon.
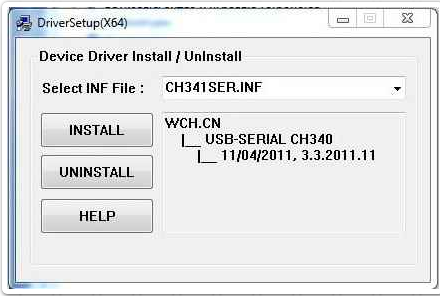
Run the installation file ch341ser.exe.
Choose INSTALL.
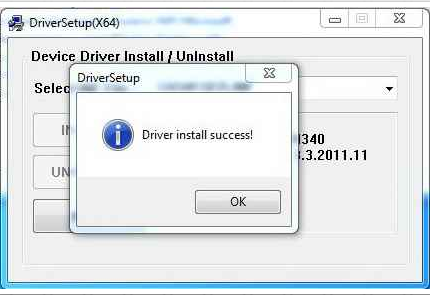
We are waiting for the message about the successful installation.
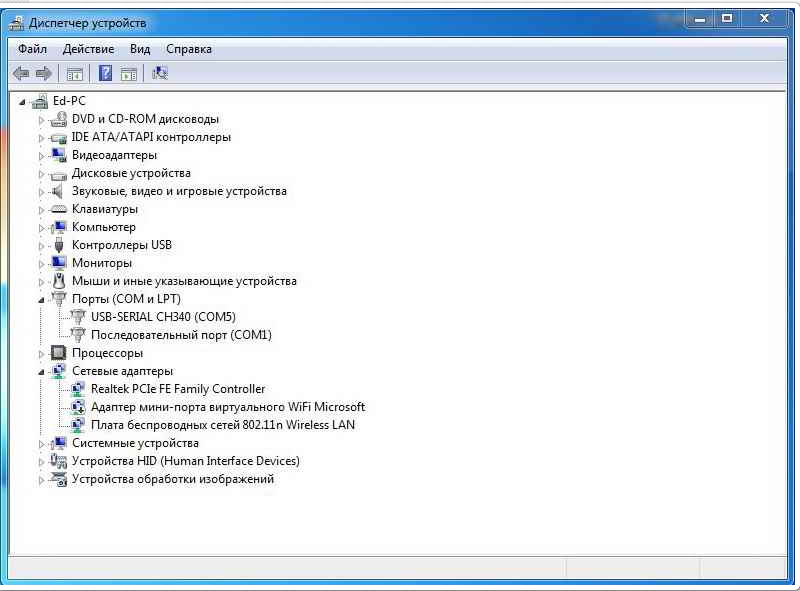
A new USB-SERIAL CH340 device appears in the device manager.
Remember the COM port number.
Running the Arduino IDE.
Run the file arduino.exe.
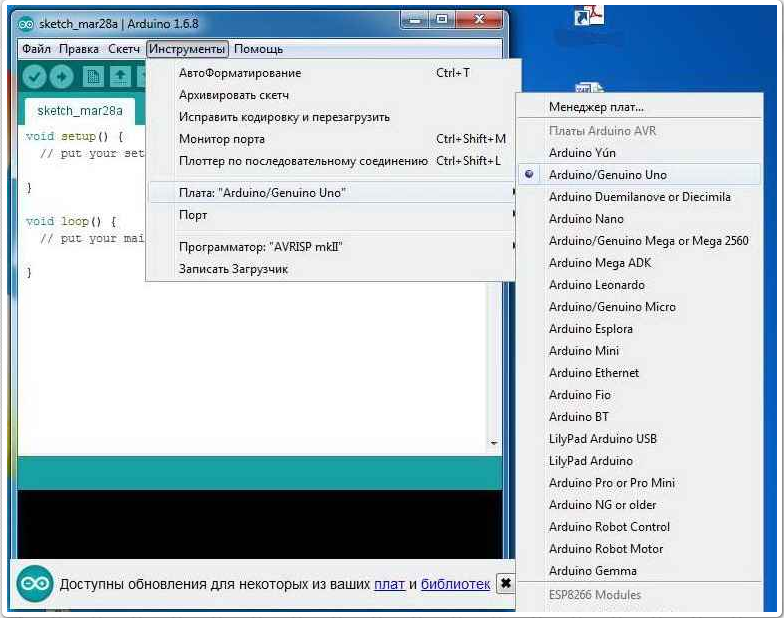
Choose the type of board Arduino: Tools -> Board -> Arduino UNO.
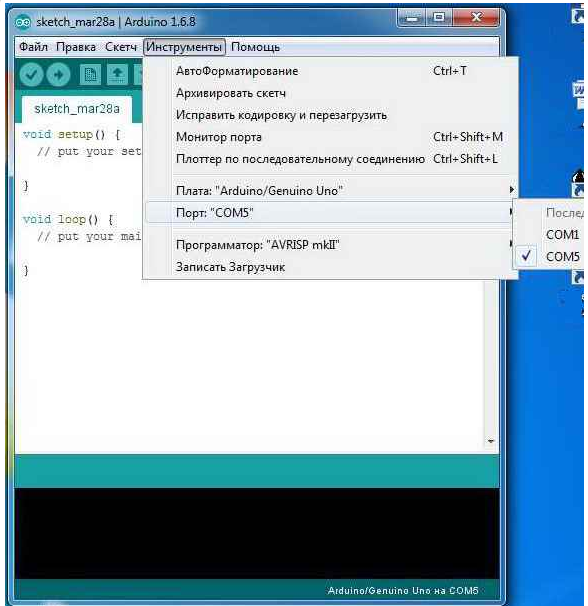
You must specify the COM port number: Tools -> Port.
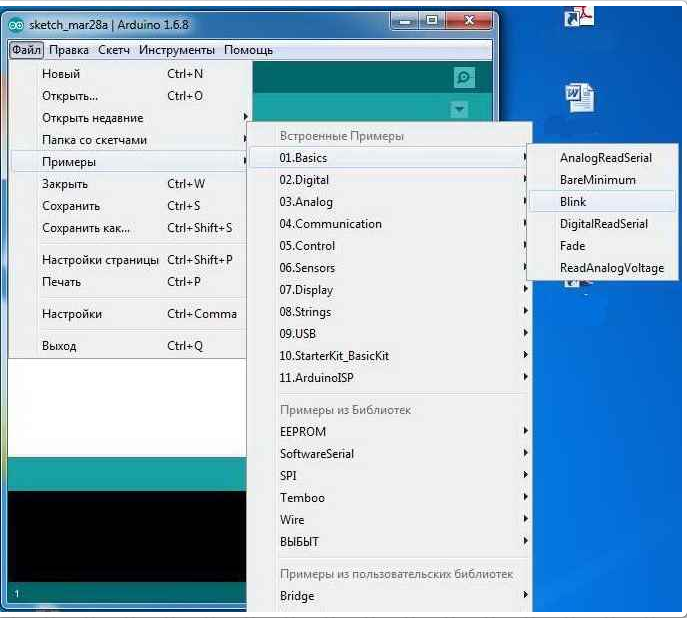
To test the operation of the system, you can start the first sketch flashing LED. To do this: File -> Examples -> 01.Basics -> Blink.
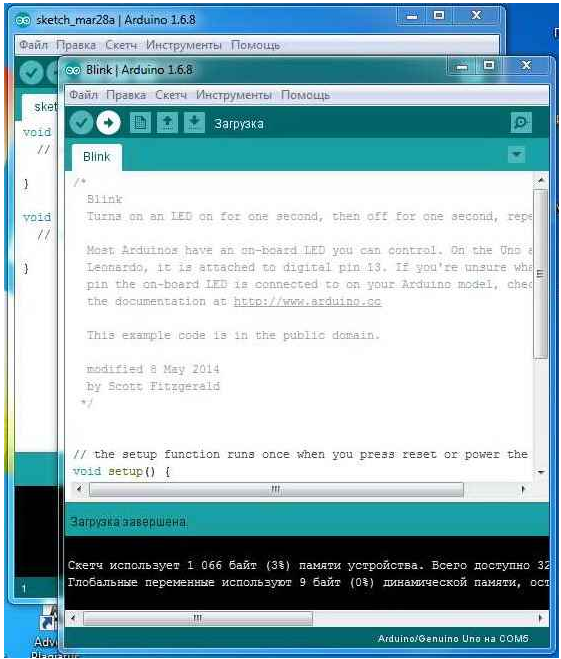
Click the Download button.
We wait while the program is loaded and the LED on the board, labeled L, starts to flash approximately once per second. So everything was done right.
In the next lesson we will get a minimum knowledge of the programming language for Arduino - the C ++ language.


Hi, the whole thing is going well here and ofcourse every one is sharing information, that’s genuinely excellent,
keep up writing.